

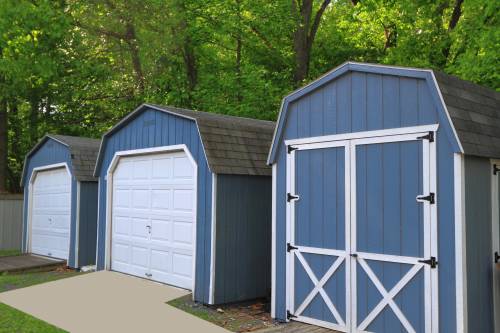
Is Storage Shed Assembly Simple?
Fully Licensed & Insured
Safety is our #1 Priority
Shed Installation Tips and DIY Features
Bringing home a new storage shed kit often feels like the start of an exciting project. With a few DIY builds already under your belt, it is natural to feel confident as you prepare for your next hands-on challenge. Most homeowners already have common tools like drills, tape measures, and levels, so assembling a prefabricated shed may seem straightforward. However, taking time to understand the process in advance can help you decide whether to build it yourself or rely on a team of professional assemblers for a cleaner and more efficient result.
Even though most shed kits include an installation manual, the actual process can be more complicated than expected. Understanding what the project truly involves will help you determine whether doing it yourself is worth the time, effort, and potential risks.
1. Define the Site
Choosing the right location is one of the most important steps in shed assembly. The ground must be level, properly drained, and wide enough for easy access.
Start by marking the future shed’s footprint with four corner stakes. Walk around the perimeter to confirm there is at least three feet of open space between the shed and any nearby structure. This clearance ensures proper airflow, makes maintenance easier, and gives you room to work during assembly.
If you plan to use lighting, power tools, or equipment inside the shed, evaluate whether electrical access is available. Extension cords may be necessary if the nearest outlet is far from your chosen spot.
2. Prep the Site
A shed needs a stable, moisture-resistant base. Removing sod and leveling the soil surface prevents long-term issues like sinking or water pooling. Spread pea gravel, compact the base soil, or set masonry blocks to improve drainage.
Before digging or leveling, verify that no buried utilities run beneath the selected area. Many homeowners are surprised to find hidden cables or pipes where they least expect them. A bit of caution prevents expensive damage.
3. Choose a Foundation
Your storage shed requires a strong foundation to support its structure and protect its contents. Common options include:
- Wooden platforms, which are easier to work with and suitable for temporary or lightweight storage.
- Poured concrete slabs, which offer the most durability and structural stability.
- Concrete blocks, which offer a balanced and affordable solution.
The best foundation depends on how long you intend to use the shed, what you plan to store, and the weather conditions in your area.
4. Secure the Shed to the Foundation
Regardless of the foundation type, the shed must be firmly anchored. Use exterior-grade screws to attach a shed to a wooden platform. For a concrete slab, anchor bolts and nuts designed for masonry are necessary. A hammer drill fitted with the correct concrete bit is essential for achieving a secure connection.
5. Install Wall Panels
Metal shed panels are lightweight and easy to lift, but also flexible and difficult to stabilize without help. While one person can carry the panels, installing them upright requires two or more sets of hands. Proper alignment is critical because even slight misplacement can affect the roof and door fit later.
If you are handling a larger shed, additional support—such as temporary bracing—can make the installation process smoother and safer.
6. Add the Roof
Once the walls are secure, it's time to install the roof assembly. Proper roof installation is essential for ensuring long-term waterproofing. If you misplace a screw or angle a drill incorrectly, you risk puncturing the roof and creating leaks.
Most metal storage sheds use a three-step roofing process:
- Install the front and rear gables
- Position the roof beams
- Attach the roof panels with weatherproof fasteners
Many shed kits include special center and side coverings that improve waterproofing and reinforce the roof against wind and rain.
7. Install Doors and Windows
Doors and windows are the final major components of shed installation. Misalignment or improper sealing will cause water to enter during heavy rain, which can damage stored items. Use silicone sealant around seams and check that doors open and close smoothly before finishing the project.
Additional Tips for a Smooth Assembly
- Use a power drill. Shed kits contain hundreds of screws.
- Keep essential tools nearby, such as a level, measuring tape, and ladder.
- Take time to adjust and re-check your leveling. Poor leveling causes alignment issues with pre-drilled holes.
- After assembly, spray the shed from all sides—including the roof—and check from inside for leaks.
Is Shed Assembly Really Simple?
On paper, shed installation looks manageable. In reality, it can be labor-intensive, time-consuming, and easy to get wrong. If you're assembling a metal shed, even a small error like slipping with a drill can puncture a panel. The lightweight materials also make it difficult to keep walls stable without extra help.
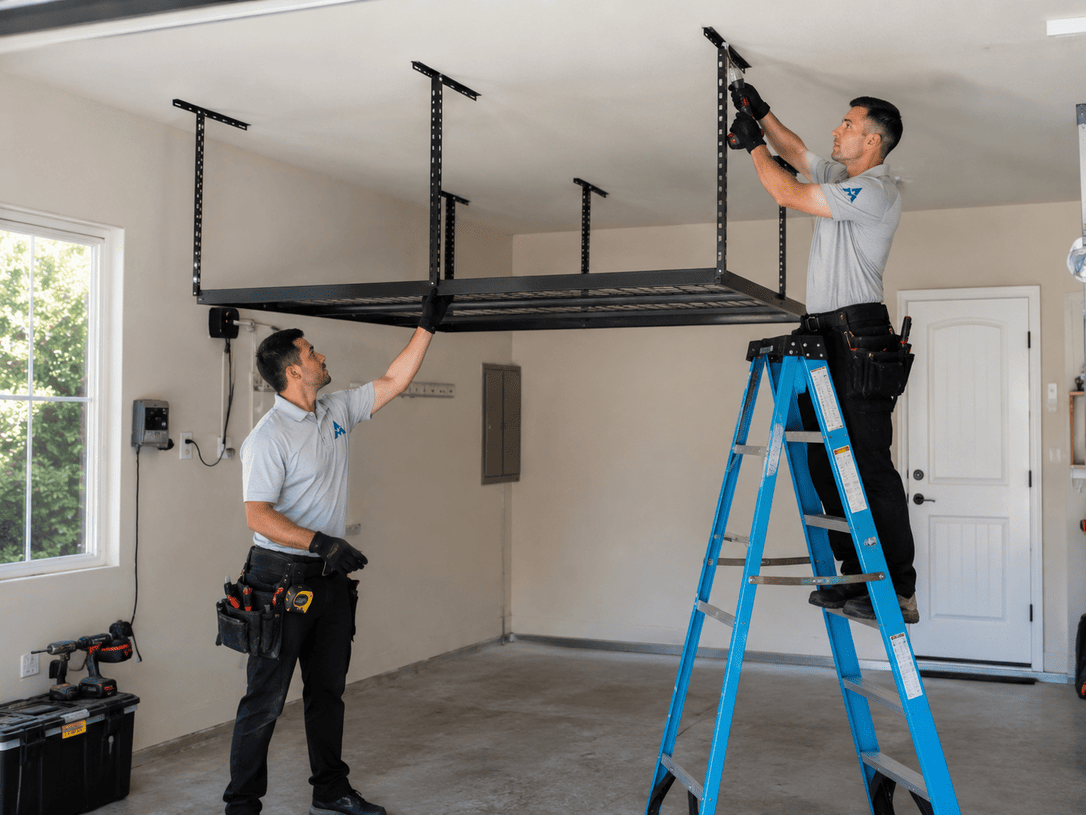
Many homeowners discover halfway through the project that shed assembly is more complex than it seemed. Instead of spending hours dealing with misaligned panels and structural concerns, you can rely on professional backyard shed installation for a smooth, stress-free experience.
And if you’re handling other home projects, calling trusted home assembly specialists can simplify furniture, equipment, and outdoor structure installation across your property.
When you are ready for expert assistance, simply
Contact us to schedule a visit. Shed assembly is our specialty, and we’re here to help you get the job done right the first time.
FREQUENTLY ASKED QUESTIONS
Is it hard to assemble a storage shed by myself?
Many homeowners can assemble small sheds, but larger or metal sheds often require multiple people. Tasks like leveling the ground, securing panels, and installing the roof can be challenging without professional assistance.
What tools do I need for shed installation?
You will need a drill, level, tape measure, ladder, silicone sealant, and sometimes a hammer drill for concrete anchors. A power drill is essential given the number of screws required.
How long does it take to assemble a shed?
Most shed installations take anywhere from 4 to 12 hours, depending on size, foundation type, and your experience level. Professional teams can typically finish much faster.
Do I need a concrete foundation for my shed?
Not always. Wood platforms and block foundations work for many shed types. However, concrete is the most durable option and best for long-term stability.
To Ease Your Move Or Redecorate Your Home Space
Follow a Few Easy Steps
Tells us your needs
Please fill up the contact form and provide us with as many details of your project as possible.
Approve Estimate
Our experts will review your project needs and create a plan that works with your schedule. You will then have to review & approve the plan via email.
Project Kick-Off
Once you have approved our solution plan, we'll send professional installers who own just the right tools & equipment in their arsenal to complete your project.
Customer Service 24/7
We’d love to hear from you. Choose the most convenient method and we’ll get back to you as soon as we can.
Contact Us
Contact Us
2707 N Rolling Rd #109, Windsor Mill, Maryland 21244
+1(410) 493-4488
VA
Any Assembly Virginia
+1(703) 596-0086
DC
Any Assembly Washington
+1(202) 684-6782
PA
Any Assembly Pennsylvania
+1(267) 209-0710